Aloha everyone!
Let’s start at the very beginning. A very good place to start. I have you singing it now, don’t I?!
Today I’m going to walk you through the basics of how to cut your cardstock to make a card.
CUTTING CARDSTOCK TO MAKE A CARD
- Start with a sheet of 8 1/2″ x 11″ cardstock. With the 11″ side at the top, cut your paper in half at 5 1/2″. Each sheet of cardstock makes 2 standard sized cards. Score down the middle at 4 1/4″. Fold.
- Another way: With the 8 1/2″ side at the top, cut your paper in half at 4 1/4″. Score down the middle at 5 1/2″. Fold.
ADD LAYERS
- Cut 2nd layer 4″ x 5 1/4″
- Cut 3rd layer 3 3/4″ x 5″
Here’s what you end up with. A basic card. Now you can stamp and add embellishments. I’d recommend stamping on the Basic White cardstock before glueing it on your card. If you make a mistake, just turn it over.

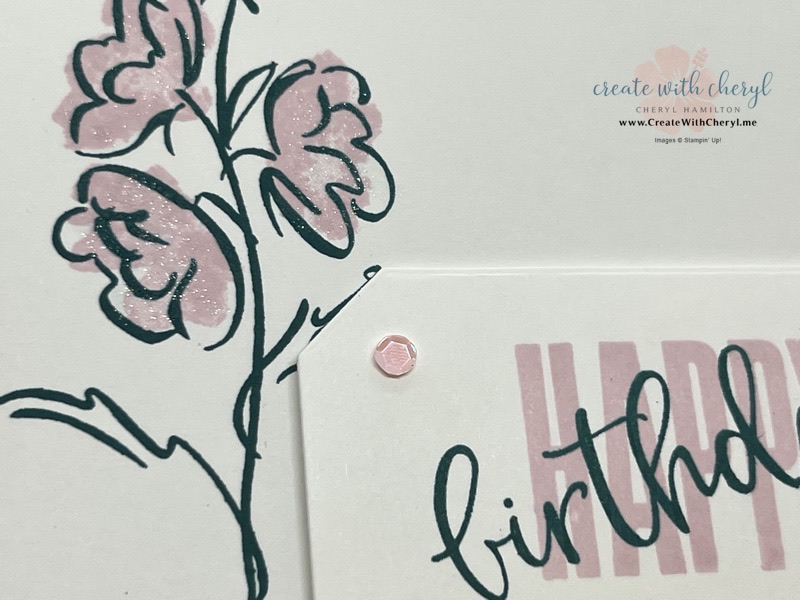
Here’s my finished card. I’ve stamped the flowers from the Color & Contour stamp set and the sentiment from the Something Fancy stamp set using Pretty Peacock ink. The abstract filler stamp on the flowers is stamped with Bubble Bath ink.
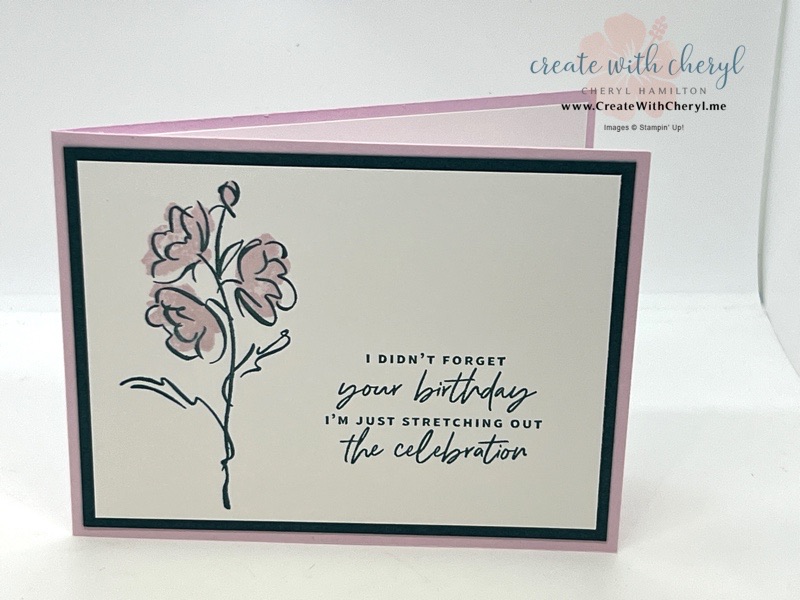
I’ve added some sparkle using Wink of Stella glitter pen. You’re going to want to get one of those!

For the inside, I could have written on the Bubble Bath cardstock, but it looks much nicer by adding a layer of Basic White cardstock (4″ x 5 1/4″). I like to decorate the inside of my cards, along with the envelope.

I’ve made a video to help you get started with your cardmaking!
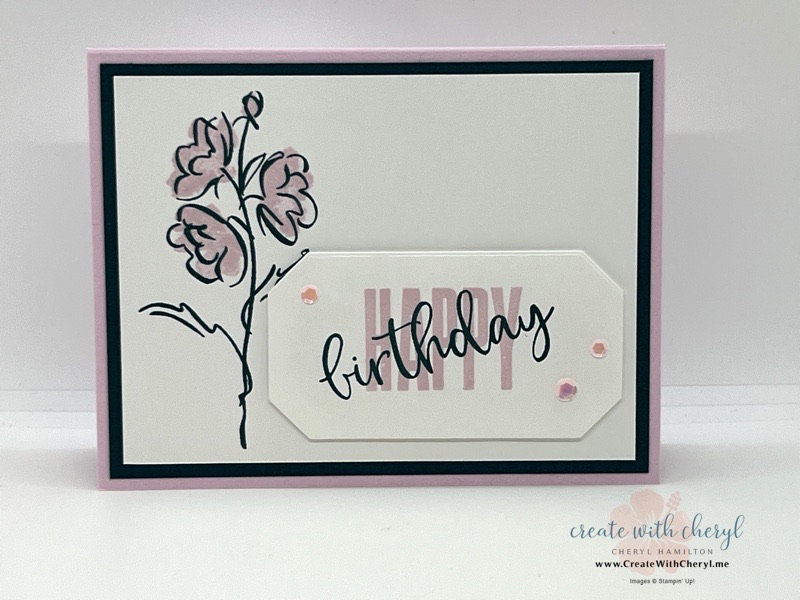
This next card is similar, but I wanted to cover up a mistake, so I stamped Happy birthday using Biggest Wish stamp set on a Basic White scrap, then cut it out using Countryside Corners and my Stampin’ Cut & Emboss Machine. This is a bigger investment, but so much fun! You could also achieve a similar look by using a punch. I’ve added a few sequins and love the final card!
I hope you give it a try! It’s addictive- you’ve been warned!
Here’s a list of the supplies I’ve used. Click on the item to add it to your shopping cart.
Here’s another Back to Basics Video you might enjoy:
BACK TO BASICS- USING YOUR PAPER TRIMMER
If you find you have a big Wish List, consider signing up to become a demonstrator! One of the biggest perks is that you get a 20-25% discount on everything!
Hope this inspires you to make a few cards! Please contact me at cheryl@createwithcheryl.me with any questions you have.
Be sure to use this month's Hostess Code: AHJBASBS


Leave a Reply